Introduction
Ensuring high availability and disaster recovery is critical for modern database environments. SQL Server 2019 provides robust solutions through Failover Cluster Instances (FCI) and Always On Availability Groups. This guide will walk you through the step-by-step process of setting up a two-node SQL Server Failover Cluster, adding additional nodes, and configuring an Always On Availability Group to ensure business continuity.
Step 1: Adding a Second Node to the SQL Server Failover Cluster
A SQL Server Failover Cluster enhances availability by providing automatic failover capabilities. In this step, we will add a second node to an existing FCI setup.
Prerequisites:
- An existing SQL Server 2019 FCI with a primary node.
- A virtual machine with the SQL Server 2019 ISO mounted.
- The same service account credentials used for the initial setup.
Process:
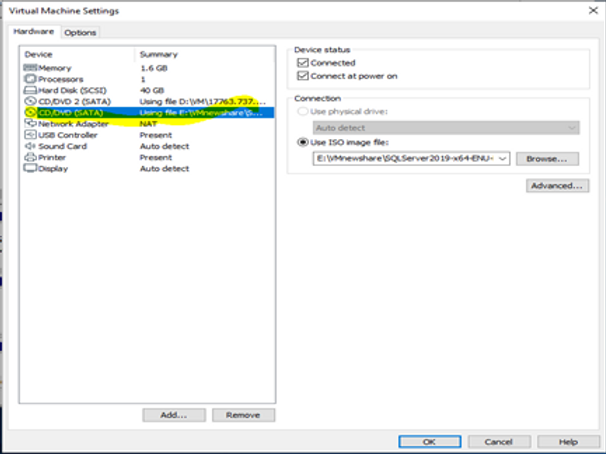
- mount the ISO on the virtual Machine Settings.
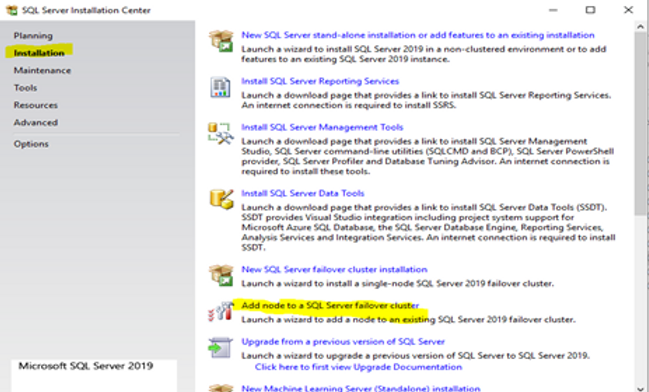
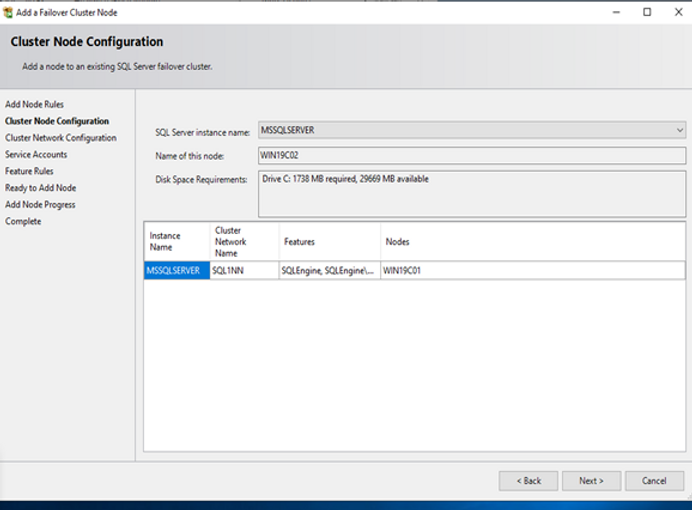
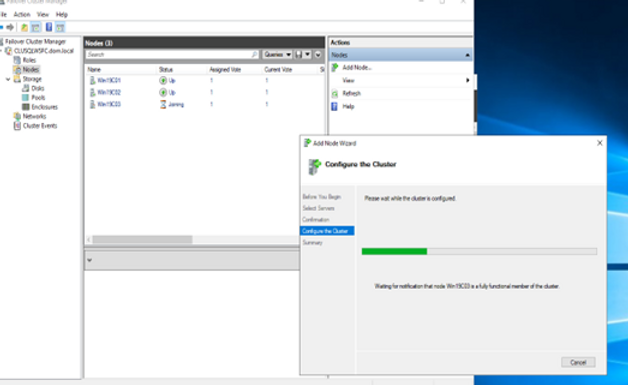
- Open SQL Server Installation Center and select Add Node to a SQL Server Failover Cluster.
- The system will validate the existing SQL Server 2019 FCI configuration.
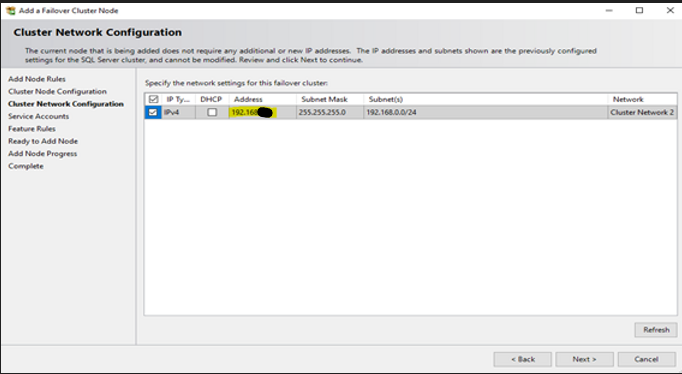
- Configure the Cluster Network:
- Ensure that the IP address matches the one used during the first node setup.
- Use the same service account credentials.
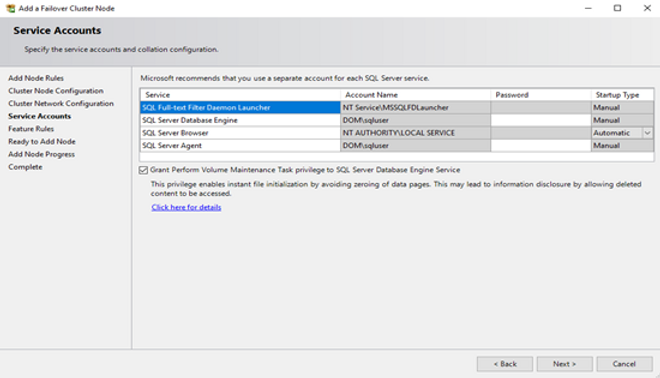
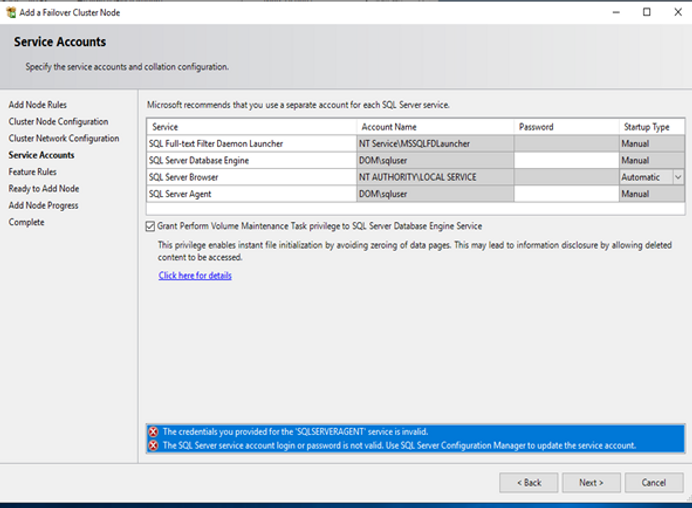
Common Errors:
[Error Message]
The credentials you provided for the 'SQLSERVERAGENT' service is invalid.
[Details]
Microsoft.SqlServer.Configuration.Agent.InputValidationException: The credentials you provided for the 'SQLSERVERAGENT' service is invalid.
================================================================================
[Error Message]
The SQL Server service account login or password is not valid. Use SQL Server Configuration Manager to update the service account.
[Details]
Microsoft.SqlServer.Configuration.SqlEngine.ValidationException: The SQL Server service account login or password is not valid. Use SQL Server Configuration Manager to update the service account.
- Invalid Credentials for SQLSERVERAGENT Service: Verify and re-enter the service account password.
- SQL Server Service Account Login Invalid: Use SQL Server Configuration Manager to update the credentials.
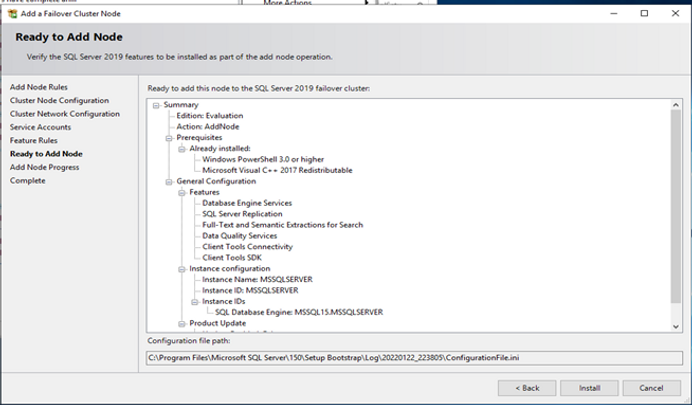
- Once all configurations are validated, proceed with the installation.
Step 2: Adding a Third Node to the Failover Cluster
For greater redundancy, we will add a third node to the cluster.
Prerequisites:
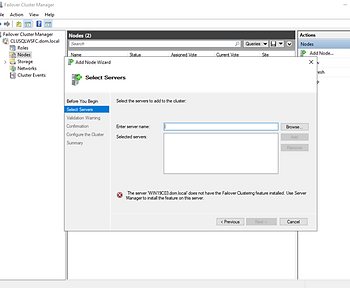
- The third node must have the Failover Clustering feature enabled.
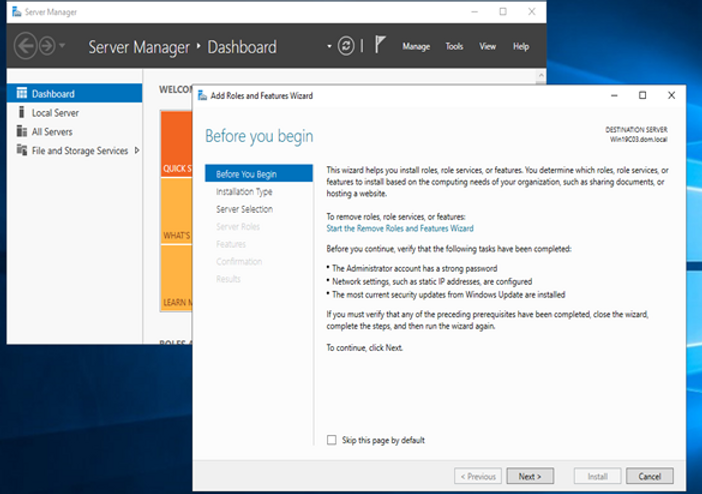
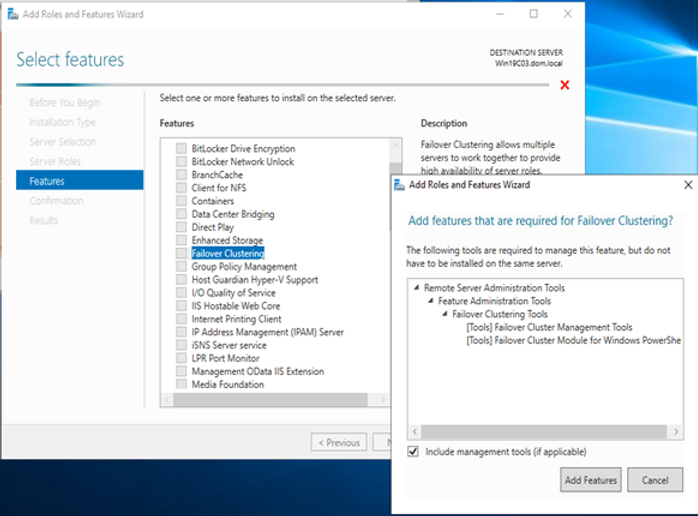
- Use Server Manager to install the Failover Clustering feature if missing.
Process:
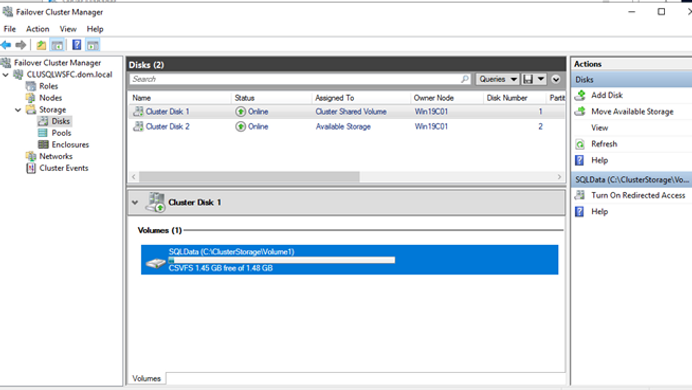
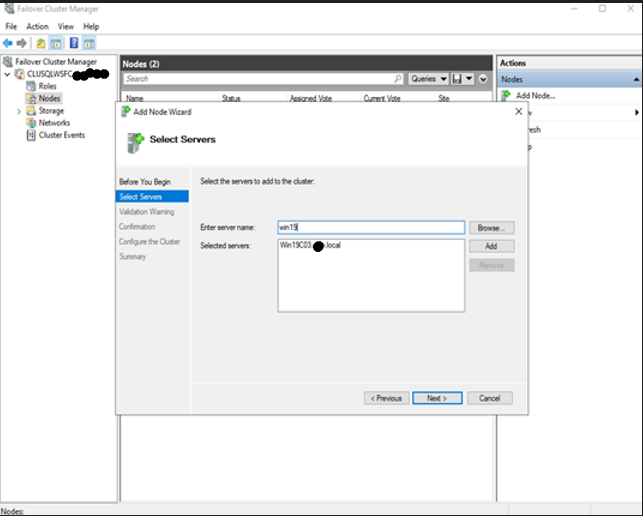
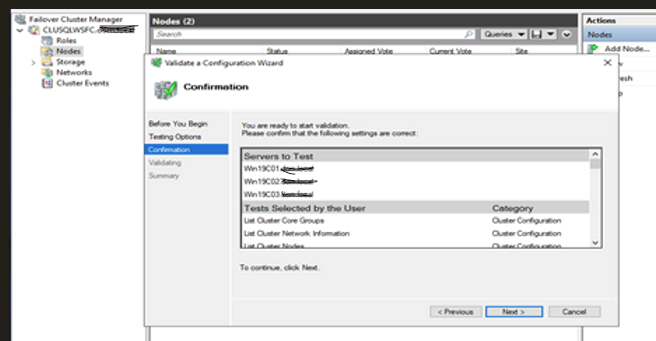
- Launch Failover Cluster Manager and add the third node.
- Run the Validate a Configuration Wizard to ensure proper setup.
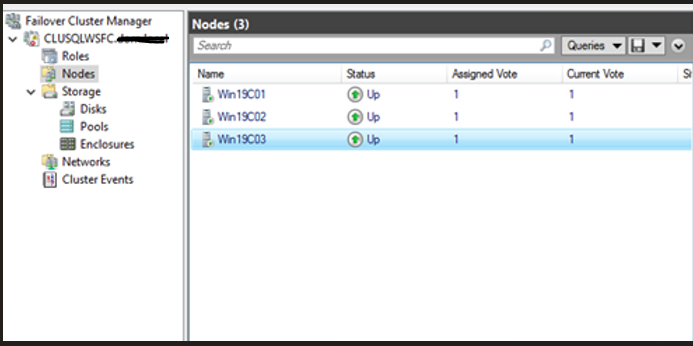
- Confirm that all three nodes (WIN19C01, WIN19C02, WIN19C03) are added successfully.
Common Errors:
The server 'WIN19C03.test.local does not have the Failover Clustering feature installed. Use Server Manager to install the feature on the server.- Add Failover Clustering by firing up the Server Manager – Manage – Add Roles and Features – Role-based or feature-based installation – Feature :Enable Failover Clustering – Add Features.
Step 3: Enabling Always On Availability Groups
Always On Availability Groups provide high availability at the database level, enabling data replication across nodes.
Process:
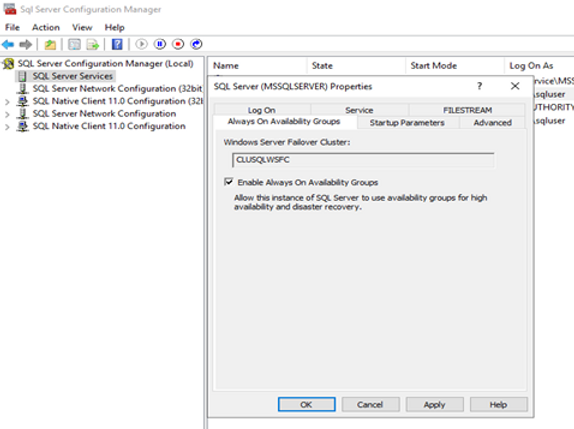
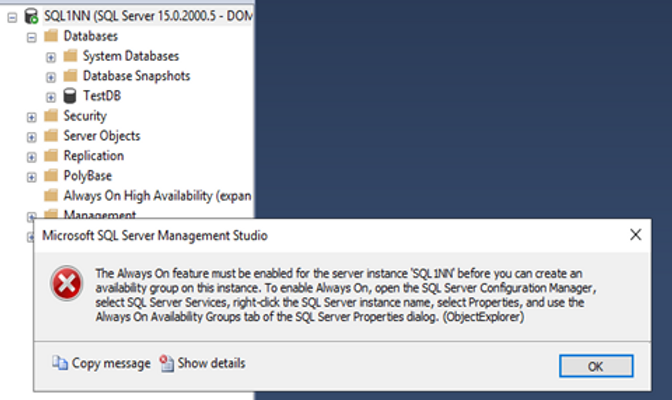
- Enable Always On Availability Groups on the Primary Node:
- Open SQL Server Configuration Manager.
- Navigate to SQL Server (MSSQLServer) Properties.
- Enable Always On Availability Groups.
- Repeat the process on the additional nodes.
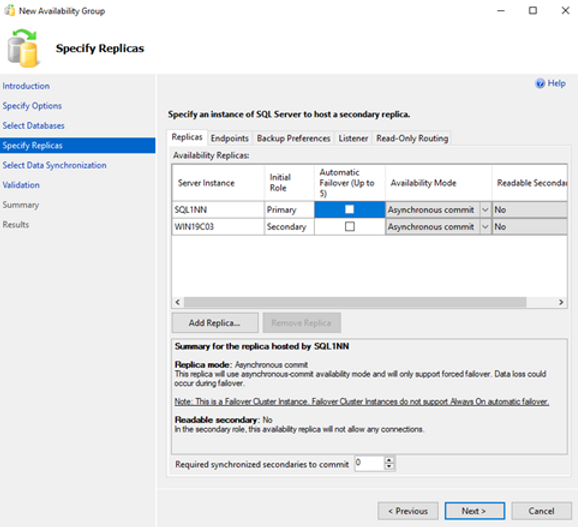
- Create an Availability Group (AG):
- Open SQL Server Management Studio (SSMS).
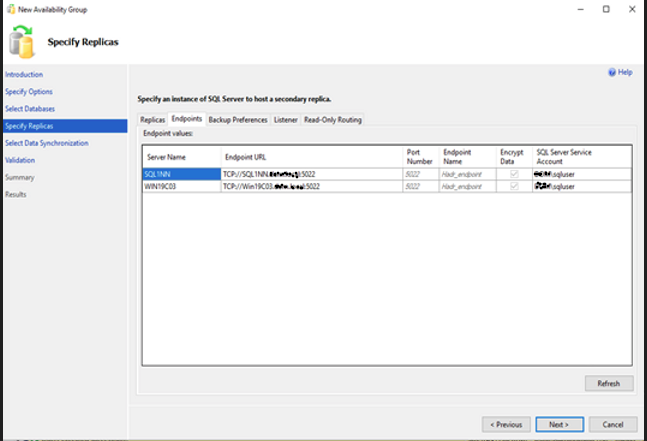
- Navigate to Always On High Availability > New Availability Group Wizard.
- Provide an Availability Group name.
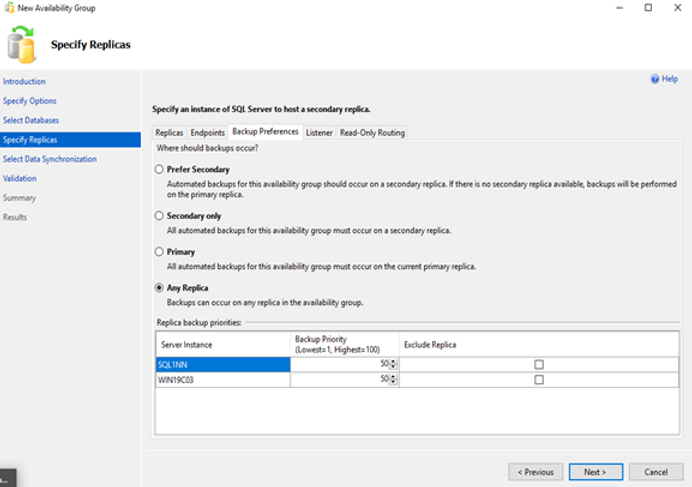
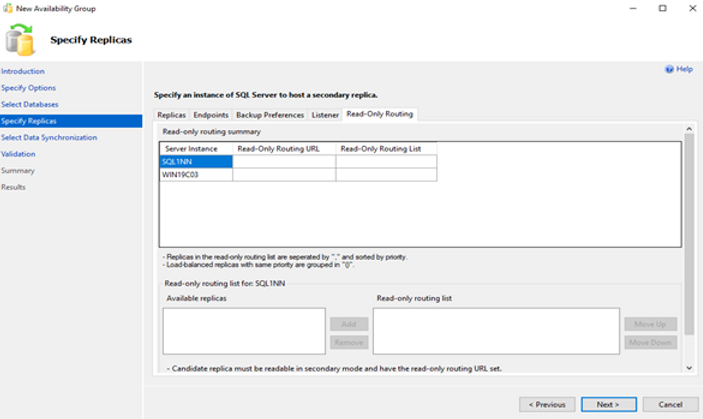
- Add the replica servers (SQL1NN- Network name and WIN19C03).
- Set backup preferences to “Any Replica”.


Step 4: Adding a Listener for Client Connectivity
A listener provides a single point of access for clients connecting to the database, ensuring seamless failover.
Process:
- Open SSMS and execute the following SQL command:
USE [master]
GO
ALTER AVAILABILITY GROUP [AG1]
ADD LISTENER N'ListenerAG1C0' (
WITH IP
((N'192.168.0.*', N'255.255.255.0'),
(N'192.168.1.*', N'255.255.255.0')
)
, PORT=1433);
GO
OR
If the setup includes multiple subnets, add an IP address for each subnet,like the above.
Troubleshooting:
Have you ever encountered the following error message while trying to create a Listener in SQL Server? "Msg 19456, Level 16, State 0, Line 107 None of the IP addresses configured for the availability group listener can be hosted by the server 'WIN19C01'. Either configure a public cluster network on which one of the specified IP addresses can be hosted, or add another listener IP address - Error: None of the IP addresses can be hosted on the server.
- Ensure that a public cluster network is configured.
- Assign a unique listener IP that does not conflict with existing nodes.
- In a SQL Server setup with two subnets, it is crucial to have an IP address assigned for each of the subnets available. This means that the IP address for the listener cannot be the same as one of the node’s IP addresses that is already in use.
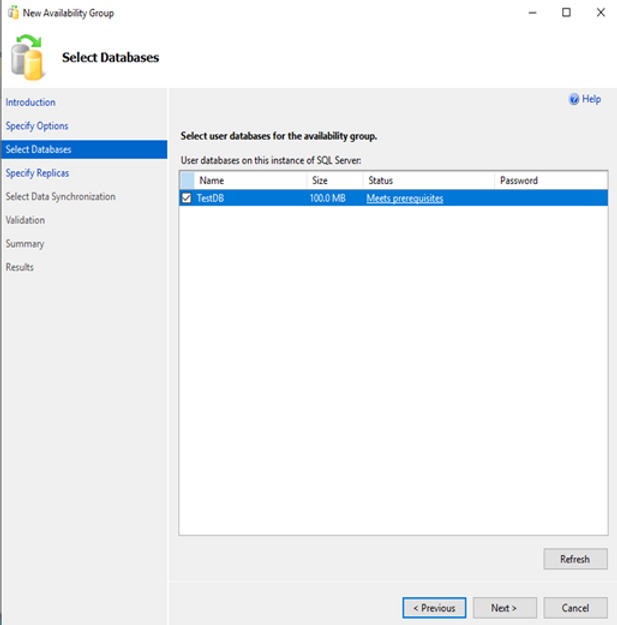
Step 5: Adding a Database to the Availability Group
To test our configuration, we will add a sample database to the Availability Group.
Process:
- Create a test database:
CREATE DATABASE [TestDB];
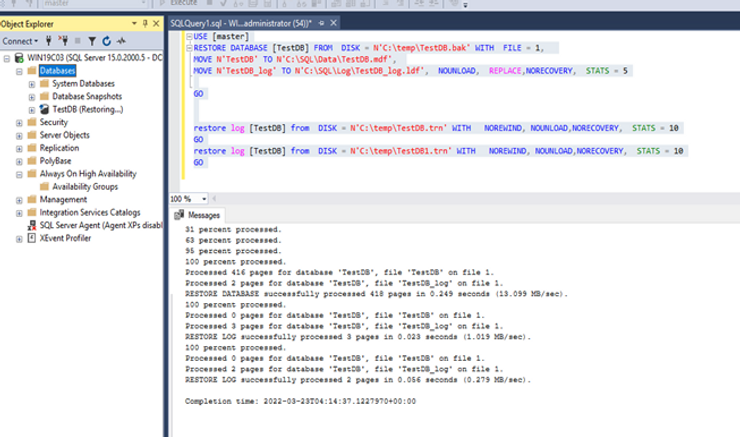
2.Prepare the secondary node:
USE [master];
RESTORE DATABASE [TestDB] FROM DISK = N'C:tempTestDB.bak'
WITH FILE = 1,
MOVE N'TestDB' TO N'C:SQLDataTestDB.mdf',
MOVE N'TestDB_log' TO N'C:SQLLogTestDB_log.ldf',
NOUNLOAD, REPLACE, NORECOVERY, STATS = 5;
GO
GO
RESTORE LOG [TestDB] from DISK = N'C:tempTestDB.trn' WITH NOREWIND, NOUNLOAD,NORECOVERY, STATS = 10
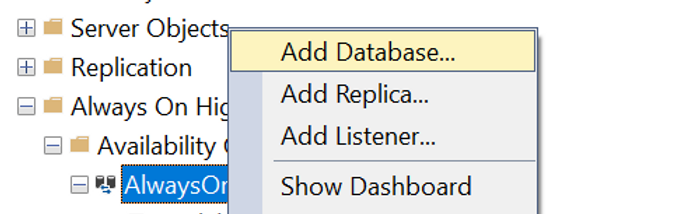
3.Add the database to the AG:
Right-click on Availability Group and select Add Database.
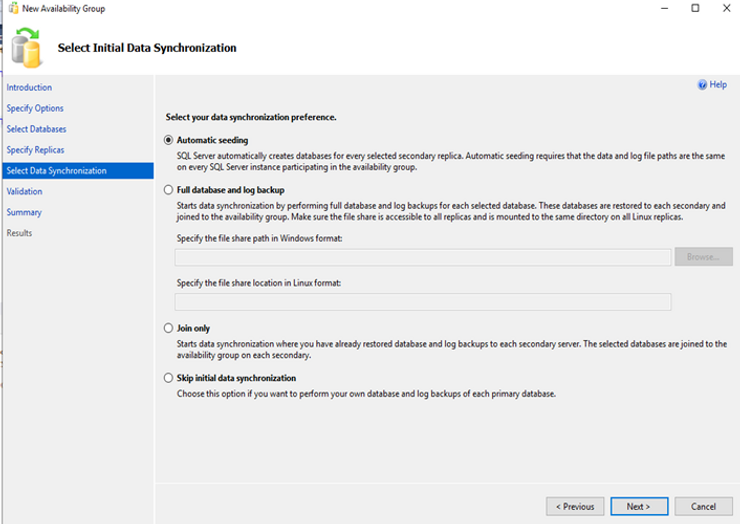
Connect to the replicas and set data synchronization to “Join Only”.
Seeding requires the data and log file path are the same on every SQL server Instance participating in the AG. So we are using the JOIN ONLY.
Summary for the replica hosted by SQL1NN
Replica mode: Synchronous commit
This replica will use synchronous-commit availability mode and will only support manual failover.
Note: This is a Failover Cluster Instance. Failover Cluster Instances do not support Always On automatic failover.
Summary for the replica hosted by WIN19C03
Replica mode: Synchronous commit
This replica will use synchronous-commit availability mode and will only support manual failover.
Readable secondary: Yes
In the secondary role, this availability replica will allow all connections for read access, including connections running with older clients.
Summary: A Highly Available SQL Server Environment
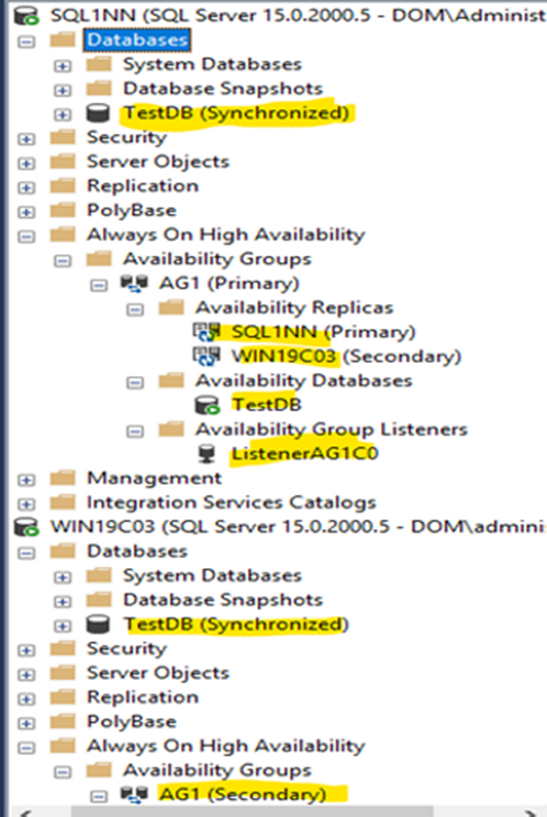
In this guide, we have successfully configured a highly available SQL Server environment by:
- Setting up a SQL Server Failover Cluster Instance (FCI).
- Adding a third node for enhanced redundancy.
- Creating an Always On Availability Group.
- Configuring a Listener for seamless client connectivity.
- Adding a test database to validate the setup.
By implementing these steps, organizations can ensure minimal downtime, improved scalability, and enhanced database resilience.
Next Steps
Stay tuned for our upcoming post on Setting Up a Distributed Availability Group in SQL Server. We’ll cover best practices for configuring network settings, monitoring, and troubleshooting to maximize data availability in hybrid environments.